Tampilkan postingan dengan label a. Tampilkan semua postingan

Senin, 25 Juli 2016

Answers to a couple of recent comments

Here is comment received regarding Fleet:-

How much does she weigh?
What I like about flint is that the center of balance is over the center thwart making her easy to carry and light enough for this senior citizen to car top.


Well, I cant tell you how much she weighs because we havent weighed her yet, but the material thickness is the same as on Flint and the area of plywood is only 8.4% higher, indicating an 8.4% weight increase.  The Fleet shown in the pictures has a foredeck and inwales, but the standard Flint and Fleet have tank-tops on the foreward and aft buoyancy tanks, so it probably all evens out.

Based on just the plywood in the bare hull, the weight of Flint panels is 24kg(53lbs) and in Fleet the same is 26kg(57lbs). The centre-of-gravity of the hull panels (including transom without framing) is at 1.96metres forward of the aft perpendicular i.e. at the midships thwart near the aft edge.

The weight of any boat depends tremendously on the density of the materials used, and the attitude of the builder.
________________________________________________________________
In relation to my recent post on the virtues of the sprit rig with the jib set flying, Dennis Marshall writes: -

May I ask what the line is hanging from the peak of the sail?

Dennis is asking about the light line which can be seen in a number of photos, running down from the head of the sail at the peak end of the sprit

The light line is just visible in this photo
The line is a vang. I suggested that it be used in certain conditions when hard on the wind and when running free, to control the amount of twist in the sail, and (when running) to prevent the head of the sail from moving forward of the beam i.e. forward of a a line drawn at right angles to the centreline of the boat. If a sail moves forward of the beam, it is a sure invitation to a Death Roll.

The light line is run from the head of the sail near the peak of the sprit down to a thumb-cleat on the weather quarter and then to a little fairlead on the rudder head and then along the tiller to a small V-jamb cleat within easy reach of the helmsperson. When tacking or jibing, the line is flicked off the thumb-cleat and quickly moved to the one on the new weather quarter.  It only requires a light tension on the line (vang) to haul the head of the sail in to reduce twist in the sail.
Read More..

A Dory for Gazela Primeiro and at the end tips on glass application

A while ago I received a nice email from Tony Souza regarding construction issues with a new dory he intended building for the old Portuguese barkentine Gazela Primeiro.

Hello Ross,
Thanks for your recent article "Stems and Trailers".  In that article you discuss natural timber vs plywood construction and show the merits of plywood glued lapstrake for boats that are dry stored.
Im trying to choose a construction technique to use for a reproduction dory that will be "dry sailed".  The dory is a Grand Banks dory of 17 feet overall, 13 feet on the floor. The new dory has to resemble closely the last of the three dozen Portuguese grand banks dories that sat on the deck of Gazela Primeiro, the 100+ year old Portuguese barkentine on which I am one of the all volunteer crew.  Last winter we patched and repaired the last dory, and this year Id like to build a dory to be used often for the teaching of boat handling, rowing, and dory sailing.  the boat handling includes launching and retrieving over the side using hand operated boatfalls. The new dory will spend most of its time stacked inside the old dory, the two as deck displays of what was used in long line fishing of the early 20th century.
As a matter of resemblance the new dory will have four frame sisters overlapped, removable thwarts, 5/8" cedar planking, solid gunwales, a mast step on the floor and two sets of oarlocks.
For ease of construction and in keeping with the dry storage idea I plan on using modern materials where I can.  The flat bottom will be Meranti plywood already on hand, no need to soak the floor seams closed before putting boat into the water.  The frames are already built from laminated ash. Tree crotch and buttress sections are too difficult to find.  I plan to epoxy the garboard plank to the bottom, glass tape and epoxy the inside seam.  After planking I plan to turn the boat over and glass the bottom and garboard with cloth.
After that long prologue we come to my uncertainty area, the clinker planking joints.  Its tempting to use lap-stitch aka ship lap joints, easily cut with a router and epoxy fastened.  On natural, i.e. not plywood, timber that may lead to splitting along the grain at the join.  Likewise dory lapped (rolling bevel) joints likewise glued might suffer splitting.  I should have said earlier that using modern glues and eliminating metal fastners is a goal.  The old dory is a pincushion of steel nails on the planking joints which has resulted in rusty streaks and rotten wood.  (Of course dories were not supposed to last more than a couple years in ocean service. Old dory is probably 40+ years old.) 
Would it be better to caulk the planking seams with Boat Life, a polysulfide, rather than epoxy fasten?  The frames are there to give cross grain strength.  With your expeience you might see that Im headed for problems not yet envisioned.
Any suggestions will be very welcome and gratefully accepted.
Gazela can be seen at
www.gazela.org.
A picture of the old dory is attached. 


Here is part of the text of my reply: -

I agree totally with your concerns regarding "hard" gluing of either "lapstitch" or dory-lap joints when using natural timber rather than plywood - I believe that they would definitely crack at the point where the planking thickness returned to single-plank. Harry Bryan wrote about the matter when he did a couple of articles for WoodebBoat Magazine about the building of his Daisy design. She had either double-planked cedar (glued with epoxy) for the bottom, or a single sheet of plywood. The topsides were planked with lapstrake cedar planks in the normal manner (I think using copper clench nailing from memory). The important thing in our context is that he expected her to be dry-sailed, and after completing the planking in the normal way, he dragged a sharp, flat-blade screw driver along the underside of the lap on the outer side of the planking. This produced a sort of square-shaped groove of about 1/8" x 1/8" in the underside of the lap. He then filled the groove with a bead of polyurethane (I would use 3M 5200 or Sikaflex 292, using a polyurethane-specific primer)

Having said all that, I wonder whether you could just glue the entire lap with polyurethane (I dont know enough about polysulfide to say anything about its adhesive qualities where no fastenings are used). The polyurethane is strong enough, but I dont know whether a fully-glued lap would allow enough movement to overcome the cracking problem, even given the flexibility of the compound - but my guess is that it would be ok, especially if the glue-line was thick.

If I was doing it, Id go the copper-fastened route, with the polyurethane (or polysulphide) run into the groove under the lap.

I think that the garboard arrangement you propose would be fine. The glass on the outer face should supply cross-grain reinforcement, and the tape on the inside will extend some distance beyond the vulnerable line of intersection between the inside faces of the bottom and the garboard.

On two boats I built (one of which ended up in the Jody Foster film, Nims Island - see the recent comment made on Duckworks http://www.duckworksmagazine.com/10/reports/may/index.htm ), I made the bottom from Western Red Cedar glued strip, continuing around the turn of bilge, after which I continued the planking as plywood glued lapstrake. I cut the bevel on the bottom planking to accept the first lapstrake plank before glassing the bottom. When glassing the bottom, I continued the glass right around and onto the bevelled face. This meant that when the first plywood plank was glued on, the glass was sandwiched between the WRC strip planking and the inner face of the plywood - the aim being to prevent splitting in the WRC.  This explanation is a bit clumsy, but I havent got time right now to do a sketch. In your case this will not be necessary, as you will have the glass on the outside of the cedar planking anyway.

??
Western Red Cedar bottom planking
???
Bottom covered with 400gsm (12oz) double-bias glass and the first two planks of plywood lapstrake attached - the first plank going over the glass, which itself had been laid over the bevelled edge of the cedar bottom planking.
???Here is Tonys latest up-date: -

Hiya Ross,
Here are three pix of the dory project to date.  This boat is a copy of the last original belonging to Portuguese fishing barkentine Gazela Primeiro.  You can see more pictures on
www.Gazela.org and my facebook page. My version of the dory has a meranti plywood bottom and white cedar planking over laminated ash frames.  The gunwale and cap are white oak. The dory will essentially be dry sailed i.e. living on Gazelas deck most of the time and occasionally be used for crew training and exhibition at home and ports of call.
After corresponding with you some time ago I took your advice and epoxy joined only the garboard plank to the bottom.  The rest of the construction has followed traditional methods. The upper edge of the garboard and the remaining planks are dory lapped and copper riveted.  Planks to frames are joined with Si bronze screws.
I think we talked about covering the bottom and up to the upper edge of the garboard with synthetic cloth and epoxy. 
Now areas where I could use advice:
What cloth would be appropriate? I dont think the dory will ever see a beach, but it might. So a light cloth should do.
Is there an advantage to graphite additive to the epoxy?
Any tricks to applying the cloth?
Thanks for your help,
Tony Souza


And part of my reply: -

Dear Tony,

Thanks very much indeed for the up-date, and for the nice photos. The boat looks super to my eyes, and Id love to take her out in the rough stuff - preferrebly with some weight in the bottom to represent the ballasting effect of a load of Cod!

My appologies for the delayed reply - we have been recovering from the devastating flash-flood which wiped us out on January 10, and priorities tend to be re-arranged!

For the cloth, the simplest would be 200gsm (6oz) woven glass. This is light and easy to use, and gives a good level of protection, and more importantly, provides a sort of screed to ensure an even thickness of epoxy. Dynel is also a good option (4oz, I think, but you would need to check with the supplier). Dynel is bulkier than glass for the same weight, and it has superior abrasion resistance - I like it on decks - but it doesnt have the tensile stiffness of glass so it will have less structural effect on the garboard-to-bottom joint. For a hefty boat like yours which may get handled roughly, Id give serious thought to using 400gsm (12oz) double-bias glass cloth. It isnt woven, so it takes bends fairly well, and with the fibres aligned 45 degrees/45 degrees, every fibre crosses the longitudinal joints. It is cheaper than woven glass, but is heavier than the normal 6oz stuff.

I normally use the dry application method (for weights up to 12oz). I lay the cloth over the dry, sanded, and vacuumed surface, and them smooth it into position with a dustpan brush or a wide, dry paintbrush. Tape any troublesome edges down with temporary bits of masking tape. Then start by mixing small quantities of epoxy and pour them onto the glass (or Dynel) and spread them with a squeegee - I use rectangles of 1/16" model aircraft balsa as they can be bent along the grain if required, and the corners dont snag on the glass.  Dont press too hard, as you will end up aerating the epoxy and making it go creamy with minute air bubbles (just like what happens when whipping cream). Just use a gentle figure-eight sweeping motion to get it out onto the surface. Dont fuss about getting it to wet-out - that will happen automatically. Keep on mixing, pouring and spreading until the entire surface is covered. Small batches are good, as they dont heat up so rapidly in the container.

When the surface is covered, use disposable brushes and/or disposable foam rollers with about a 1/8" nap to distribute the resin evenly. I use dry brushes and rollers - they pick-up from the excessivcely wet areas and put down in the dry areas. When all is even, use the squeegees again (held at about 45 degrees to the surface) to scrape off excess resin so you end up with just the wet cloth, but no visible pooling of liquid resin.

After the epoxy has gone off enough to be certain that the cloth wont float up off the surface - this depends on temperature and rate of cure - but when it gets to a "green"state of cure, lay on several more coats of epoxy to fill the weave so that when you finally sand the surface (after removing any amine blush with water and cloths, sponges or Scotchbrite pads) you are only sanding epoxy and not going through to the glass.

Have a look on my website under the button labelled "First Mate Photos 3" for a brief pictorial demonstration - the thumbnails enlarge if you click on them.
Read More..

Kamis, 21 Juli 2016

Sailing a Wooden Classic


I was brought up in an environment where building ones own boat was part of competeing at the local Yacht Club. Im talking about the early sixties and seventies, and Im grateful to have been around for the experience. Why dont people build their own boats for competition any more?

These days it seems that dinghy racing revolves around the purchase of an off-the-shelf production boat, whether it be new or second-hand. Well, in the past there were a lot of good boats designed for ordinary people to build and race, and one of the most prominant designers was Jack Holt. Tens or even hundreds of thousands of his designs were constructed by amateurs - Mirror Dinghy, Heron, Enterprise, GP 14, 125 to name just a few.

Arguably, one of Jack Holts best designs was the Lazy E or as it is currently known, the National E. It is said that the Lazy E was designed as a successor to both the Enterprise and the GP 14, and that she had all of the virtues of the preceding designs with none of the vices.

A few months ago my middle son, David, bought an old and fairly rough Lazy E. He was hesitant at the time, being in a position where he had to be careful with his money, but decided to go ahead anyway. The old boat has proven to be a great success, and here is a short video to show what fun one can have with somebody elses cast off equipment. This shows Dave and my oldest boy, Geoffrey, enjoying a simple day-sail off Manly, Queensland, Australia. Dave on the tiller, and Geoff on the trapeze. Despite what some people say, I believe in the new generation!


Enjoy the video - you can do it as well!
Read More..

Rabu, 20 Juli 2016

Star45 What is a hull Daves construction categories unofficial

Model Sail Boat Building, How To Build A Wooden Star45 R/C Sailing Model: What is a hull ? and construction categories
A composite hull:
a hull constructed of wood and covered with reinforced plastic (cloth impregnated with resin).

OR:
a hull constructed using a laminate (sandwich) consisting of reinforced plastic (cloth impregnated with resin) on two sides of a core . Core materials may be foam or wood.
Read More..

Selasa, 19 Juli 2016

Answers to a few comments

I apologise for not having replied to the last few comments, but Ive been snowed under with other duties and this is my first opportunity: -

Rossco, Did Ross Trinder use 4mm or 6mm ply on his longer Water Rat? With my 9 Water Rat I used 4mm with a full length centre stiffener of 1/4" x 4" western red cedar ( from an old verical blind) plus some smaller ply pieces and a pair of heel pegs, between the centre stiffener & the chine.You can see these in the photos I put up in Duckworks Magazine forum under "Water Rat".The bottom seems quite stiff enough with these, plus of course,the fore & aft facing seat mounting cleats. My Water Rat weighs only 17kg,which is very light,so using 6mm will probably increase it to about 25kg which is still very portable. Would "rowerwet" be better advised to use 6mm if he intends surfing his boat? Al Burke
Ross Trinder used 6mm ply on his long version of Water Rat and she turned out to be about 28kg (62lbs) which is quite heavy. However, he said that he used locally-sourced "Pink" BS1088 ply. In Australia "pink" ply normally means Pacific Maple (Meranti) or a Malaysian hardwood like Keruing all of which are quite heavy. If built from 6mm Gaboon (Ochume) the plywood weight of all of the panels in a 10.8 ft Water Rat should weigh 10.5 kg (23 lbs). Ill leave it up to your judgement to work out how much the timber, glass, and epoxy would weigh.
As Al Burke points out, the boat can be made from 4mm material, but stiffeners will be required in strategic locations. The stiffness of a panel increases (and decreases by the cube of the thickness, so 6mm ply which is supported around all edges is 3.375 times the stiffness of the same panel in 6mm!
 Here is another one from my mate, Al: -

Rossco, By way of a general comment on both First Mate & Phoenix3,I have been impressed with the speed Paul Hernes achieves in the videos of him sailing in a stiff breeze & the ease with which he handles the boat.I know the sensation of speed appears greater when close to the water,but he is ceratainly clipping along. My question is:- are both designs able to break out & plane? Al Burke
Yes, Phoenix III can break out and plane. In the following photos you can see John Shrapnel sailing Paul Hernes boat on a good day with a deep reef tied in the mainsail. This is a good demonstration that traditional rigs can drive a boat fast! I havent had direct experience with First Mate yet, but Id expect her to be as good or better due to being wider at the rail and easier to hold down. Both boats have substantial rocker, so they sit bow-high when planing, but the result is not extreme.


From Shaun come two nice comments: -

Your photos and step by step explanations are a huge selling point for me. They keep bringing me back to the blog. Not only are you highlighting your designs but are show casing the workmanship that goes into turning out a beautiful boat. I am hoping to make my first build a Flint with sails. I started a bit backward and have built some spoon oars first to get the hang of epoxy. Cheers, Shaun
Nicely done photos and commentary, makes me believe I could replicate the process. I am interested in trying some birds mouth oars. Do you include such plans with your Flint design? Cheers, Shaun

Shaun has said that he has started backwards by building oars first, in order to gain experience with epoxy. I think this is an excellent approach for an inexperienced builder and I encourage the method. The other thing to do is to build a very small tender of simple canoe so as to get the hang of the processes. In my First Mate plans I include patterns for a simple galley box which is made as a mini-stitch-and-glue project.

No, Shaun, there are no Birds Mouth spar plans for Flint, as the spars are so short and slender that the weigh saving does not justify the trouble. In fact, the spars for Flint are parallel-sided and can easily be made out of a wide variety of materials including alloy tube and carbonfibre tube. Id make them from timber - it feels nicer to the touch.


Im currently finishing off the Whimbrel plans, but due to workload the process will take about another month, I think. I like the boat very much indeed, and she should be a simple project for someone who has some experience.


Read More..

Senin, 18 Juli 2016

A boat stowable jig system

About Denali, some fiscal clusterfuckery, and a prediction Id be happy to see come to fruition...

Heres a jig system that would come in very handy for various boat projects...


...and it stows! More info can be found at the Woodpeckers website.

Listening to High Dive Heart

So it goes...
Read More..

Sabtu, 16 Juli 2016

the A or FAIL conundrum

This is just so seriously fucked up, some interesting reading, and a historical synopsis you might find intriguing.

I just finished "Knights Cross" by Cristine Kling which is a pretty good book this morning and, as usual, my Kindle asked me to rate it and I gave it four stars. I sorta/kinda feel a little guilty about that and it got me thinking...

For me, if you have a scale of one to five stars, one star is going to be an awful book and, by contrast, a five star book is going to have to be awesome work of art and life changing. So in my view of four stars for a genre adventure novel is actually very high praise.

So, why do I feel guilty?

I think part of it is that, for what seems like the majority, there seems to be no middle ground anymore. Something is either AWESOME or its CRAP and there is simply no real middle ground any longer.

You see it a lot in the way people talk about boats and gear. People need to have the BEST and it would seem that if it is not THE BEST it must be THE WORST which is very flawed thinking process and tends to give me a headache when I encounter it. I bet this has a lot to do with the reason I seem to eat aspirin like they were peanuts.

It gets worse though. A few weeks ago I bought something on eBay which I almost did not because in the description of the product and suchlike the seller pretty much demanded/threatened that there would be hell to pay if you did not leave positive feedback and give him five stars if you were to buy from him. Which, to my mind, calls into question all that glowing feedback since they could simply be in preemptive self-defense as leaving a less than awesome feedback just might be answered by a negative review of you the buyer in return.

Personally, I read reviews to get an idea of whether something is worthwhile or not but of late with no apparent benchmarks in place its nigh on impossible to make sense of things. Made even worse by the fact that, for instance, the Amazon five star rating system is not so much good or bad but good or better. "Stars" were always an attaboy back in my elementary school days when we were were rewarded with gold and silver stars (not that I recall ever getting a whole bunch of gold stars for my penmanship or good work habits). Maybe what they should do is add some negative ratings (one to five piles of crap?) to the mix to make for a more reality based scenario.

So, about "Knights Cross" in my personal scale Ill give it an eight as it had a good beat, kept me turning pages, and was easy to dance to...

Need I say more?

Listening to Brooke Waggoner

So it goes...
Read More..

Senin, 11 Juli 2016

Yawl should know the conundrum of getting a tiller round the mizzen mast

The details of how to design a yawl so that the tiller gets around the mizzen is an interesting topic. There are a number of tricks:

Using a line steering system: Here you can see Michael Storers Beth Sailing Canoe with the tiller forward of the mizzen and the lines connecting to the rudder, which is out of the picture.


Ill add that there are a number of ways to do line steering. My Deblois Street Dory has line steering coming into the boat from a rudder yoke but there is not a remote tiller as in Beth. The Coquina is another example of line steering in which lines are attached directly to the rudder and pass through the transom, via a pulley system, and the steering line goes around the perimeter of the boat.

Using a long push-pull tiller: Here you can see James McMullens Oughtreds double ender.


Using a curved, laminated tiller or split tiller


Using a normal tiller with an offset mizzen


For the Goat Island Skiff, we go with an offset tiller as in this model by a customer:


The other methods I mentioned just wont fit the situation we have in the Goat Island Skiff, mainly because there is not room for a split tiller and we want to keep the solution simple. We are deciding about just how much to offset the tiller. You can see above that the tiller will hit the mizzen before 45-degrees. The big question is how much room do we want to give the tiller to swing. In the pictures, we decided to test a 45-degree swing. That puts the mizzen a little further off the centerline than Id like. This boat is very light and pushing a tiller than hard over makes the rudder act like a brake and the risk of losing so much speed that you cant get through the tack is something to consider. Then again, we dont need it so close that things feel claustrophobic. In the picture above of the offset mizzen, notice how little offset the mast is...the tiller must touch the mizzen pretty early. Does that give enough steerage for the helmsman when the push the tiller in the mizzen direction?

Well have a solution soon after a full-scale mock up. The way we are doing this, collaboratively, is something I do on many projects. It always gets a better result because many thoughts and ideas can be sifted through. The more the merrier. Whatever the solution I draw up, the mizzen can always be moved a little more or less off the centerline according to the skippers preference. The important thing is to maintain the rake of the mizzen, which has been determined. My point is, that collaboration with designers, customers, and other folks with experience through the forums and boat shows can be an advantage in getting many thoughts onto the table and generating the best solution.
Read More..

Sheathing a Hull with Glass and Epoxy

Over the years Ive discovered a number of building issues which people find intimidating, and one of those is the process of sheathing a hull with glass cloth and epoxy.

As with most things in small boat construction, glass sheathing is not difficult, but it must be done the correct way if one is to avoid a bad result. It is just as expensive and time consuming to do things the wrong way as it is to do it properly, so some research and preparation is time well spent! There many correct ways to do the job, but Im going to give you a very brief insight into the method which works for me. Because of space and time limitations, this is just the most basic demonstration. I hope it helps.

Prepare surfaces with longboard and other sanders. Round-over edges
Fill gaps with epoxy and sanding filler
Re-sand all surfaces with 80-grit paper to provide a good "tooth" for the epoxy, and thoruoghly vacuum the dust
Fill any minor blemishes and sand details
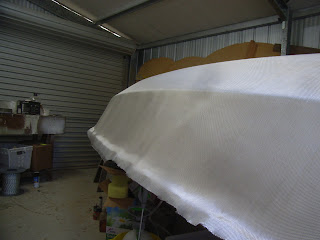
Drape hull with glass cloth and cut roughly to size
Tape overlaping areas and edges in place with a few pieces of masking tape
Smooth out cloth with a dry brush held at about 45 degrees to the surface
Trim overhanging edges with shears or scissors
Ready for epoxy
I did one side at a time on this job, so I peeled back one side and held it in place with lead weights
Mix up small batches of epoxy, pour on in sections, and spread with a squeegee held at a shallow angle. Dont press too hard, or the mix will become aerated. Just gently move it over the surface and allow a few minutes for the cloth to wet-out. Dont worry about an even finish yet - just distribute the resin and allow the wetting-out to proceed on its own.
Attend to details such as the dry edges with a disposable brush
Continue working downwards until the whole section is completely wet-out. There is no rush, as long as you continue working out from a wet edge.
When completely wet-out, remove excess resin using a squeegee initially, and then finish off with a dry foam roller. The aim is to remove all liquid resin from the surface, leaving just the wet cloth with no puddles
The result should look like this - an even, textured surface with no pools of liquid resin. The glass cloth should be in direct contact with the timber, and not be floating in puddles anywhere.
Another good example of a proper finish after the initial wetting-out coat.
After the first coat has cured to the point where it has stuck the glass to the surface, but before it has fully cured, a second coat can be rolled or brushed on to fill the weave of the cloth. This is usually followed by a third coat a few hours later. In this photo you can see how the weave of the cloth has disappeared.
Here is the hull at a later stage after the hull has been sanded. Because of the fill coats, and the smooth application process, the sanding was done without cutting into the cloth - just the fill coats of epoxy were sanded.
For bigger jobs, extra hands are required to get things done before the epoxy goes off. On this 22ft hull, we had my wife, the owner/builder, and myself all working in a team
The result speaks for itself
Read More..

Sabtu, 09 Juli 2016

Hopefully a trend

Some good news from Phoenix Arizona, some bad news from Jimmy Carter, and that Druid dude is still making sense...

In the new (September) issue of Practical Boat Owner there is a review of the Baycruiser 26 a neat 26ish-foot cruising boat that is well worth reading if youre tired of the same old same TFBTFE* boats that are the norm these days...


Listening to some Joe Jackson and Righteous Brothers covers

So it goes...

*Too Fucking Big Too Fucking Expensive
Read More..

Jumat, 08 Juli 2016

Photos of a Good Flat Bottomed Skiff

Back in April I wrote two posts about flat-bottomed sailing and rowing boats (see Discussion About Flat-Bottomed Boats and Sharpie Hulls and Fine Sections ).

Things have been pretty hectic at our place since the disasterous flash-flooding which hit our area on January 10, 2011, but over the last few weeks Ive been getting back to work on some over-due jobs, one of which is a nice flat-bottomed skiff for a customer in Brisbane. She is a Jim Michalak-designed Mayfly 14 and is a good example of a well-designed flat-bottomed hull. The point to note is the relationship between the curve (or rocker) of the bottom when viewed in profile, and the curve of the topsides when viewed in plan-view. These two shapes, in combination, determine the chine-line, and the the flow of water around that chine. The aim is to reduce cross-flow to a minimum in order to minimise eddying.

A nice, simple boat, showing the pivoting leeboard, centreline hatches, and external chine log.
Many people find external chine logs difficult to accept, but they have some advantages. They are much easier to install on a boat which isnt built on a strongback, avoiding compound bevels and determination of length. In addition, they provide good protection to the chine, which is somewhat vulnerable on a flat-bottomed boat. Phil Bolger had a theory that if the hull was properly shaped, an external chine log may reduce drag, by delaying the point at which cross-flow occurred. In addition, I guess that they provide a bit of extra lateral resistance, which is good in a sailing boat.
Brutally simple pivoting rudder design which requires only one rudder cheek. The key is the amount of blade above the pivot point, as it provides support to the blade regardless of which tack the boat is on. The patch at the bottom of the blade is where Ive cast in a block of lead to sink the blade. It is covered with a small patch of 200gsm/6oz glass to prevent cracking between the lead and the plywood. The white is epoxy and sanding filler. 
Very simple, but rugged, mast step and mast partner, well braced by framing on the other side of the bulkhead.
Close-up of the mast step showing the very necessary drain hole to get rid of water in the step. This is all a bit rough at this stage, still waiting for some clean-up and fairing work.
Close-up of the external chine log, rounded over on both edges, and showing how Ive brought the epoxy/glass bottom sheathing around the bottom edge and up over the chine log. This is to protect the vulnerable edge grain of the 1/2" plywood bottom.
Outer stem made from a superb piece of Celery Top Pine from Tasmania. Hard, dense, and strong. Still waiting for finishing work and fairing.
Close-up of the external gunwale/sheer clamp, laminated from two beautiful pieces of Silver Quandong. Note how in a simple boat like this, there are plenty of places where the edge grain of plywood planking is vulnerable - this needs to be considered, with action taken to protect the edge. The edge of this plywood will be treated with three or four soaking coats of epoxy prior to being painted, but even then it will have to be watched in service.
Detail of the corner joints in the hatch framing. Once again, Silver Quandong
The single-sided pivoting leeboard allows for a clean and open interior. Although simple in concept, the leeboard design requires great attention from the builder when fabricating the leeboard upper and lower guards, so that the board is absolutely parallel to the centreline of the boat. Trickier than it looks!
A nice, simple, rugged boat. The external stem cap is yet to be trimmed, and at this stage Im planning on finishing it off with a Jonesport Cleat.
So, there you have a nice little boat. But you dont get something for nothing. These boats might be easy to build, but they consume large numbers of silicon bronze screws, and the structure is quite heavy. However, she should give long and trouble-free service, given that she is painted properly (she will be) and stored properly
Read More..

Kamis, 07 Juli 2016

Yeah Ive been thinking quite a lot about this boat

This really fired up my imagination, a little bit of good Orca news, and YOWZA...

Chimaera is obviously NOT a VolksCruiser but a lot of good ideas that could be adapted in that direction and so deserves some study.


You can find more about it here but youll need to get the current issue (#246) of WoodenBoat for the whole story.

Listening to Ronnie Fauss

So it goes...
Read More..

A couple of thoughts regarding ballast

Follow the money, a good point, and someone doing good...

So, here are a few numbers to play with;
  • A cubic foot of water weighs 62 pounds
  • A cubic foot of concrete weighs 150 pounds
  • A cubic foot of iron weighs 491 pounds
  • A cubic foot of lead weighs 709 pounds
  • A cubic foot of gold weighs 1206 pounds
Like a lot of people I like the idea of water ballast. Whats not to like... its free, you can lose it when you dont want it around, and it works. Of course, theres a downside (theres always a downside to anything) in that it takes up a lot more room than most of us care to give up within the interior.

Case in point: Phil Bolgers take apart three piece schooner that Ive often considered building as a non-take-apart boat which has often been on my shortlist for the next Loose Moose. Of course replacing the water ballast with other ballast types would gain a lot more room...

That said, somehow the idea of a 47-foot boat has lost a lot of its allure for me but would still make a certain kind of sense due to its 1.5-foot draft and enough room and stowage to be able to work on rigging jobs and build self-steering gears/dinghies/surfboards as a nomadic shop/business model.

Listening to Bob Dylan covering Frank Sinatra

So it goes...
Read More..

Rabu, 06 Juli 2016

A quick thought about boom bust economics

Mind numbing, someones making sense, and, considering hes a man who would actually know, Id say this statement is important...

A friend of mine, who has been looking for a boat for some time, pointed out that he thought the price of decent fixer upper boats would keep falling and only an idiot would buy a boat at the moment.

Me, Im not so sure.

Bubbles confronted with reality always burst sooner or later. Its just a fact of life.

Where boats are concerned it is only a matter of time before folks are going to wake up and realize it is bad economics to sell a boat for less than the price of the lead in its keel...

On a side note, one of the fastest growing  criminal activities in the US of A is the theft of raw materials from buildings and infrastructure... Copper wire/pipe, aluminum, steel, and lead being the most sought after.

Just something to keep in mind...

Listening to Blues Traveler

So it goes...
Read More..

Sabtu, 02 Juli 2016

Little Egret A Munroe style sharpie nearing completion

After having written recently about the so-called Humber Yawls, my mind turned to another type which may well provide similar character and utility, but in a boat which is vastly more simple to build.

I was brought up on the shores of Moreton Bay in south-east Queensland, Australia. Moreton Bay is a huge expanse of water protected from the open Pacific Ocean by a line of huge barrier islands - the bay itself being 100 kilometres long and 32 kilometres across at its widest point. The waters of this great waterway are open and deep to the north, but large portions of it, particularly in the southern half, are shallow and protected. As a friend once said to me, "There is a lot of water in Moreton Bay, but it is spread out very thin!" This sort of coastal area is, in my opinion, a magnificent location for dinghy cruising.

Pleasant days on Moreton Bay
 As a child, I learned sailing in Sabot pram sailing dinghies at the Cleveland Yacht Club, and I remember my father pointing out the "Sharpie" which sat on a mooring in front of the house next-door to the club. She didnt mean much to me, being a non-descript flat-bottomed boat of about 24 feet LOA fitted with a very basic cuddy-cabin. But Dad obviously thought highly of her, so I did store the image and the "Sharpie" name away in my memory.

One characteristic of this boat which I did appreciate was that the family of the owner could get her underway and put back to bed on her mooring in no time flat, and they never seemed to be stressed by the operation.

It is now more than fifty years since those days, but I have come to love the sharpie form, and marvel at the reported speed and carrying capacity of those used in the fishery, particularly the oyster fishery, on the east coast of the United States in the late ninteenth and early twentieth centuary.

A New Haven Sharpie, much used for oyster tonging in Chesapeake Bay

Some time back I wrote about the design and initial building stages of a sharpie I designed for a customer who wanted a 19 foot boat similar to one designed by Bill Schwicker in the U.S. The design ended up being very much after the style of Ralph Munroes famous Egret, which was a cross between the hull-form of a sharpie and that of a Bank Dory, and which measured about 28 feet LOA.
You can read one of my posts on the design using this link.

An early drawing of my Little Egret design

An early drawing of my Little Egret design
The owner/builder of this boat has made wonderful progress, despite having to work at his normal job and being forced to carry out his building under a tarp over an outdoor deck. His determination, resourcfulness and quality of work should be an inspiration to those of you who procrastinate!
Here are a few photos of the job, including the almost-finished boat. This is just a very small selec tion of the photos, but you can see a very comprehensive presentation of Johns photos, along with much commentary at this address  http://forum.woodenboat.com/showthread.php?139737-Little-Egret-an-Egret-style-day-sailer

Johns strongback under construction. Note his inovative a resourceful use of existing backyard structures!
Construction begins - the bottom panel being cut
Scarphed-together panels of marine plywood being marked out using offsets taken directly from the plans.
An example of determination - the project being protected from rain.
Rain protection for scarphed panels
The stitch-and-glue construction method allows one to mark shapes directly onto the plywood panels without lofting, and as long as the developed panel shapes have been correctly designed, a boat will appear without the need for a station mold or other conventional bracing structure.

Johns first glimpse of a three-dimensional hull!
The addition of prefabricated bulkheads and frames gives shape to the boat, and also refines the rocker as the topside panels are held at the correct flare.
Cleats/deckbeams being glued to the bulkheads. This can be done prior to installing the bulkheads
Birds mouth masts being assembled on Johns fence! An excellent example of lateral thinking!
Casting a lead sinking weight into the lower end of the centreboard
Centreboard at a later stage, sheathed in epoxy/glass, and having had the pivot hole drilled oversize and filled with a reinforced epoxy plug which was cast in place. This was subsequently drilled to take the silicon bronze pivot pin
The very shallow, low aspect-ratio rudder was equipped with end-plates to improve efficiency. The excellent stainless steel shaft and head were devised by John
The rudder can be held at differing depths by moving the tiller attachment point up or down on the shaft
Here it is at the deepest setting
Masking for the bottom paint
Tantalising progress! Decks and coamings in place
Very nicely done floorboards
Floorboards in place, and seat-risers being fitted
Spars being fitted out and coated. Lovely homemade cleats
A big day! Moving the boat out of her coccoon
First opportunity to see the hull shape from above. The balanced ends will hopefully make her a good bar-crosser
John has done a superb job of taking this boat from plans to reality
Launching is not too far away now, and I eagerly await test reports. As soon as anything becomes available Ill put up a post. Remember to look at Johns thread on the Woodenboat Magazine Forum at http://forum.woodenboat.com/showthread.php?139737-Little-Egret-an-Egret-style-day-sailer??
?
Read More..
 
Wooden Boat - Powered By Blogger