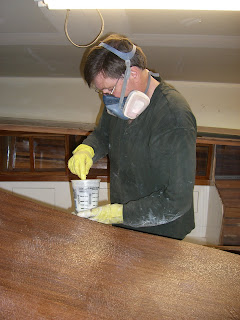
The finish work to the interior is coming along nicely with many coats of paint and varnish. Everything seems to wait for something next to it to be completed.
I finally caught a day when it was fairly cleaned up....and suitable for some interior shots...

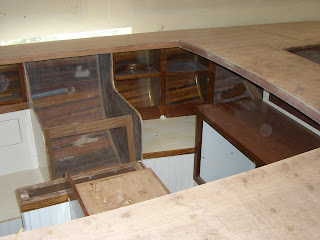
This is looking aft. The companionway will be over the engine compartment. The right side of this counter is part of the galley. The beadboard area is planned for the electrical panel.

This is looking across the saloon toward the fore storage/head area. That bulkhead will be covered with beadboard after being extended up to the cabin top, after the cabin sides are built.

We painted the settees, under the cushions, for easy touchup and durability.

We painted the settees, under the cushions, for easy touchup and durability.
Finally, everything he wanted to do prior to deck application was done.....Early August brought the deck sheeting.

Richard had reservations about the stability and strength of 2 layers of 1/4" meranti plywood for the deck. He had concerns about how to place the joints, and their ultimate strength.

He made sure the first set of joints landed on a deck beam.

Cardboard templates were used for fitting pieces around cockpit and transom areas.

After the fitting, each piece was scarphed so that the joint centers on a beam.

Cardboard templates were used for fitting pieces around cockpit and transom areas.

After the fitting, each piece was scarphed so that the joint centers on a beam.

This was done by angling the piece vertical on the table saw. (the advantages of tall shop ceilings) The 12:1 scarph joint theoretically a whole lot more flat grain vs end grain is being glued up.

The feel and size of the exterior and interior is starting to become apparent.

We are glad we went with a wider cabin. Possibly less traditional, but she will be our home.

View from cockpit forward. The underside of the decking had the areas where the deckbeams fell taped off and the remainder sanded, primed, and a first coat of paint applied. This would make the underside easier to paint after application. Painting and sanding overhead is never a pleasant job...but epoxy needs raw wood for the best adherence.
The first layer of deck is ready to be epoxied to the deckbeams.

Messy, messy.... big sheets, fumed silica thickened epoxy, and lots of scarphs have to all fit correctly and not slop onto the finish work inside.

Lots of good hold at the scarphs.

The second layer was laid out with joints staggered. These were not scarphed as they had the first layer as backing behind all the joints.

Cut and fit....
The thicken epoxy is mixed......foam rollers used for application.

5:1 mix of the RAKA 900 epoxy was used to provide the best tolerance to potential deck heat. Richard does not want the epoxy to "resoften" in the heat of the tropical sun.

Unfortunately the mix has a higher level of allergy risk. Extra care needs to be taken to avoid exposure. A post exposure rinse of arms and hands with vinegar then water helped to ward off any allergic reaction.

Ring shank nails into the deck frames and 3/8 plastic staples in the field hold the layers tight together for the drying/bonding.


A cured and trimmed deck is a beautiful thing.

Plenty of fasteners.....the plastic staples are sanded off during the fairing process.

The deck imperfections are filled and sanded.....of course, the long board is used for the final fairing.

The deck edge is trimmed flush to the hull and a 3/8 radius was routed at the top to allow for the "cloth" to roll from deck to hull. The rub rail will ultimately cover this joint. I think this joint is a key to a dry boat.

Next step is the refrigerator box. We decided the nav station lower cab was the best suited for our needs. So much insulation is needed that the size quickly diminishes. The box is square with an angle for the hull.

The insulation was purchased in 3/4" thick sheets, with reflective backings. It will not absorb moisture, and has an R value of 6 per inch....it is a total of 4" thick.

It was layered into a plywood box, with the directions of the corners alternating to prevent potential air spaces and heat loss.

The construction design decided upon came from Don Caseys This Old Boat.

The tops of the insulation have flat areas and angles to provide gasket areas and insulation transition to the fitted lid.

The lid is cut from foam and angled to fit, then covered with glass.

The insulation is glassed, then filled in numerous small steps to make a smooth finish. The crew appreciates a smooth finish for future cleaning.

The lid is filled and faired.

Box is getting pretty small, but we opted for more insulation and less space. The "freezer" will be the shallow end, and a divider will be placed after the evaporator plate arrives.

Oops....a chunk of insulation came out of the top of the lid while attempting to do the Don Casey method of lid fitting....squeezing the epoxy out between the lid and sides......yikes....oh well, only a minor repair and fill.

And now, its time to address the prop apperture. Mark did a little rework on the plans of the deadwood to help reduce potential for turbulence. He also added a trim tab to our transom hung rudder, to assist in wind steering.

The area is filled in with laminated muranti.

This area will be shaped into a double hourglass to accommodate the smooth flow of water over the prop. The tricky part for us was visualizing how the area above this flow.

It needed to be faired with the hull, and brought back to the plane of the transom and meet the transom hung rudder.

After the glass was ground away for adherence, the first layer was epoxied.

Then bronze screws were placed to reinforce.

As the area was filled in, the shape of the flow became more evident.

Some nice hefty fillets did the trick....

A little clean up with the sander....

And a new toy, a head for the grinder, will do the actual shaping.

This carbide head is VERY aggressive and will hog off material fast....Im thinking protective gear should be worn while using it....
Next came the "glassing" of the deck.

The highly abbrasion resistent "glass" was laid out over the deck.

The interior was draped to protect it from drips.

All the little edges were smoothed and fitted.....and yes, the head room remains tight....

The fabric was rolled over the edge onto the hull and taped.

It seemed like having it smooth and ready was the way to go....

I think Richard was hoping for minimal "creep" when applying the epoxy....
Unfortunately it tried to walk all over. But setting up and having it fit ahead of time made it go on smoothly and with smooth seams.

Her lines still please me immensely......

After trimming, the deck edge looks great.

Hopefully a strong seam, with no leak potential.....the deck feels very stout and solid.

Her lines still please me immensely......

After trimming, the deck edge looks great.

Hopefully a strong seam, with no leak potential.....the deck feels very stout and solid.
Next will come deciding how to build the cabin top with its compound slanting curved sides and arched top.
0 komentar:
Posting Komentar